Building A Body Part Recognizer With Transfer Learning

While scoping the possibilities of AI for medical purposes at In The Pocket, we wanted to make a proof of concept that could recognize different body parts based on a live camera feed. This type of computer vision is called image classification. A requirement for image classification is to have access to a large labeled dataset to train our model on. When making a proof of concept, you don’t always have access to these large amounts of data and neither did we in this case. A possible solution for this hurdle is transfer learning.
Transfer learning
Transfer learning is a technique where we take a model that is already successfully trained for a certain task and repurpose it to perform a different task. For example, for image classification we’ll take a model trained on Imagenet, and retrain it on our own image dataset. This pre-trained model is already capable of recognizing a large amount of objects so we can use it to extract generic features inherent to image classification such as shapes and borders. This pre-trained network should generalize well on our new classification problem.
The right data & image augmentation
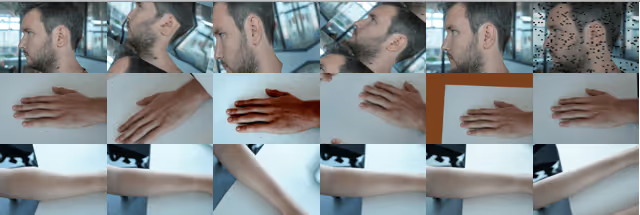
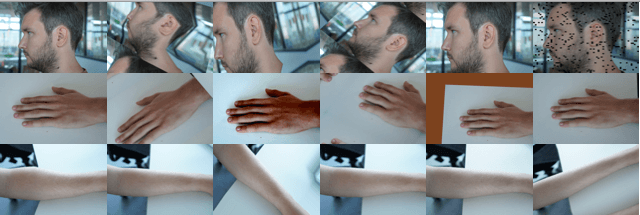
For this proof of concept the goal was to predict hands, lower-arms and faces with 90% accuracy, so we could incorporate the model into a proof of concept mobile application. We started off by collecting 360 images from 6 people, 20 pictures per bodypart per person. Next, we performed 10x image augmentation on our dataset to enlarge our dataset up to 3600 images, using this library. With augmentation, we perform a series of tasks on the images like flipping, adding noise, changing contrast, sharpen, inverting channels, masking small areas; each step creating a different yet similar image. Some examples can be seen on the image below.

Feature extraction VS weight initialisation
After constructing a dataset with 3600 samples from 3 classes, it was time to train our model. There are a couple of strategies we can follow to perform transfer learning, but we’ll look into two examples at each end of the transfer learning spectrum: feature extraction and weight initialisation.
Feature extraction consists of using the representations learned by a previous network to generate new features for novel images. We then train a new classifier from scratch with these features. With weight initialisation, we start from a pre-trained model and unfreeze the final layers of the model, allowing the weights to fine-tune and adapt to our dataset. If you want to read more on this topic, get yourself a copy of this great book from the author of Keras.
Feature extraction can be done on your local CPU but at the cost of accuracy. For our body-part detection model, we used weight initialisation. It requires a lot more computation power, so we’ve trained our model in the cloud using a Google Cloud VM with a Tesla K80 GPU in about 1,5 hours.
Training our model
We used Keras as a Python library running on top of Tensorflow to train our model. First we have to determine which pre-trained model we want to use. Because of its size and performance on mobile, we choose mobilenet v1 224, trained on Imagenet, as our pretrained model to implement transfer learning on. We import the convolutional base and unfreeze the weights by setting it’s last layers trainable and we compile our model.
The way to feed our training data into the script is very easy: The Keras ImageDataGenerator expects the train and validation images to be structured into a train and validation folder where the images are sorted per class in subfolders with each name representing the image class.
And lastly we call our fit_generator, train our model and save our trained model.
Convert .h5 to CoreML
To be able to use our trained model in an iOS app, we have to convert it to CoreML. Fortunately there is a library that does just that: coremltools. We just have to import our model and convert it to a coreML model.
Inference in iOS
Once we had a trained model, it was time to put it to use on a device. We chose iOS and CoreML hoping it would be as easy to use as Apple promised, and we weren’t disappointed. Integrating a trained model into an iOS app, feeding it data and getting results out of it is surprisingly simple.
After dragging the model into our project we can see the model evaluation parameters right in Xcode, which is handy when setting up the model’s inputs and outputs in our app. Here we can see the model expects a 224x224 pixel image as input, and that it outputs 3 probabilities — one for each body part our model is trained to recognize.

When we import our .mlmodel, Xcode auto-generates a Swift source file with helper classes for the model, its inputs and outputs. This decreases the amount of boilerplate we have to write ourselves in order to interface between the application and our model.
After that, most of the work is in the app itself — setting up video capture and formatting the data to fit our model’s expectations. In our case we take frames from the live video feed at a fixed interval, crop them to a square area in the center of the screen, resize them to 224x224 pixels and convert them from iOS’ internal image format to raw RGB data. We then pass that to our CoreML model and wait for a result to be returned asynchronously.
The amount of code needed to actually call into the model is extremely minimal: one line to request a prediction, one line to get the results. The app developer doesn’t need any knowledge of machine learning at all to use this — he just needs to be exact about the inputs and outputs and how they are formatted.
The result of our prediction request is the output of the final softmax layer — a number between zero and one for each type of body part we are able to recognize. We enumerate these in the app and associate an index and some display properties to them, so we can easily go from a raw number to a human-readable result in the app.
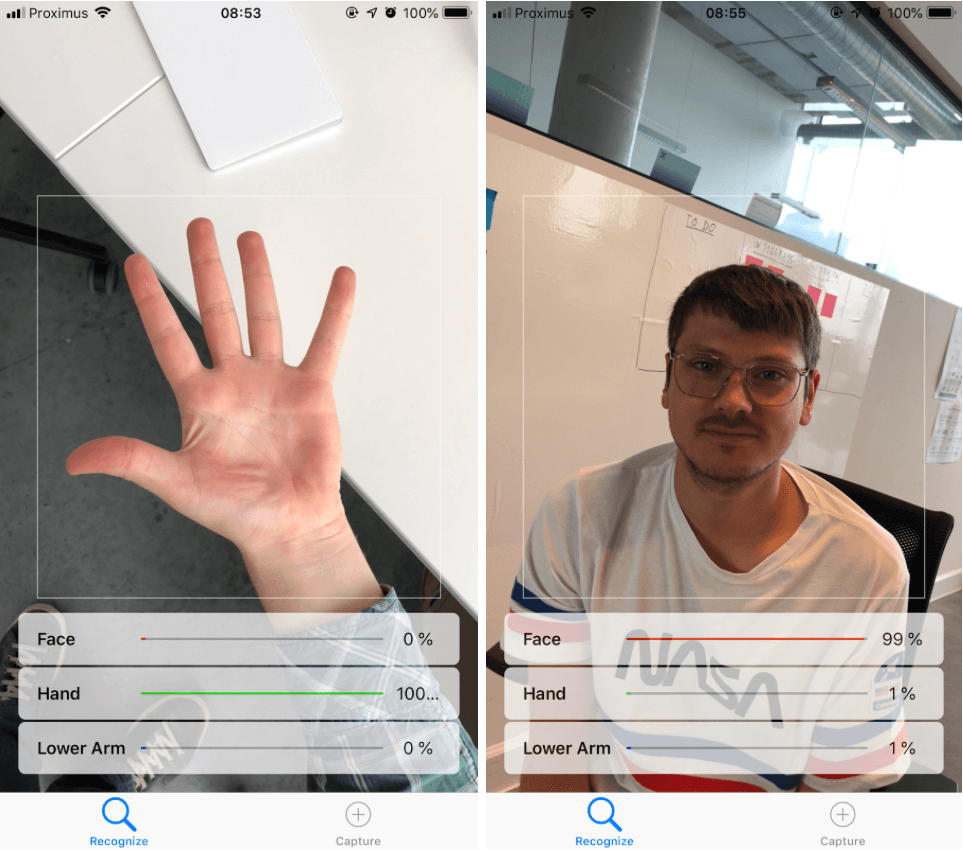
On an iPhone the end result looks something like this:

Performance
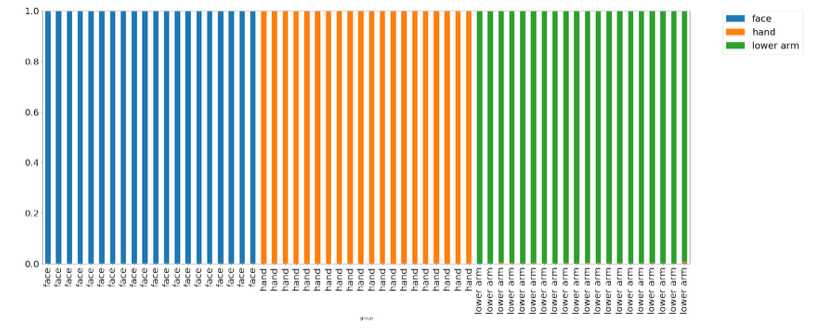
Recognition accuracy exceeded our expectations: the model recognizes faces, hands and lower arms reliably. When we feed 30 test images into our model, we see consistent predictions.

Predictably, runtime performance depends heavily on the processing power of the device. On recent iPhone models like the iPhone 8 or iPhone X, the prediction takes 20–25ms — effectively real-time, considering the camera captures images at 30 frames per second.
At the low-end things aren’t quite as instantaneous: a five-year-old iPhone 5S takes about 10x longer to process a frame at 220–250ms. However, since we don’t block the main thread but wait for results asynchronously, the only effect the user sees is a slight delay in recognition feedback. Prediction accuracy is always the same, regardless of processing power.
In practice, the majority of smartphones in use today are capable of using this kind of model on a live camera feed and presenting a fast, solid user experience.
Conclusion
Training a decent performing image classifier on a small dataset can be quickly done with transfer learning. When we introduce more than three body-part categories, we expect that we’ll need to do more fine-tuning to get the same performance. Still, seeing the ease with which we can build vision models on mobile devices, we’re just getting started to imagine the possibilities of computer vision in our product.
